Saturday 29 November 2014

Terrain - Ruins of Osgiliath

Well since I have a bit more space now I figured it was time to do some terrain projects. The first I thought I'd do ius to paint a Games Workshop piece that I have had lying around for years, the Ruin's of Osgiliath, intended for their lord of the rings game but I figure it's just a generic stone ruin mostly.

Step one was to paint the runins which turned out to be the easy part, I glued them together then based with black GW spray. I did a dry bursh with Stormvermin Fur which is a dirty grey color, then bane Baneblade Brown, then finally Palid Witch Flesh. On top of that I did a bit of a wash with the lquitex brown one, but used a paper towel to wipe of most of what got on the flat surfaces to keep into the crevasses without getting the tinting effect of the washes. Then finally on a few spots I did a green was to make it look mossy and run down a bit. I may go bakc and add some moss and ivy later but I am done with it for now hah.

The basing ended up being the big challenge, my first plan was to glue it to some Foam Board, and then use white glue to glue on some sand for painting. I used 5min epoxy to glue down the ruins which was fine, but when I glued down the sand it wrapped the base allot.


As you can see the back corner lifted up a good couple of inches so not going to work. I cut of all the foam core to free the ruins which was very messy and a huge pain.

The group suggested MDF, but that is a bit hard for me to buy and cut so I went to Hobby House to see what they had on Tod's suggestion. They sold me a piece of plastic sheet of about the same thickness that they figured would avoid this problem, but suggested roughing it with sand paper first.

I also got a sheet of greenish material people use in train modelling to replace the sand. I glued the sheet to the plastic board with white glue, but it didn't adhere that great and lifted around the corners. I think this was due to my impatience and should have left it over night. But I glued the ruins onto the grass sheet with 5 min epoxy and then used that to glue down the parts that didn't stick on the mat which turned out to be allot and another pain.

After that I used white glue to put sand around the bottoms of the ruins and then painted that to match and blend them in. I also used a coupple of resin pieces form Architects of War to make a little campsite in the ruins.

Here's the final successful piece.


Ended up being way more of a hassel then I would have thought but I learned a fare amount of things to do better next time I guess. Let me know what you all think.

Thanks;
Mike

Thursday 27 November 2014

Battle Report - Flames of War - Devils Charge Part 1

So we decided to start playing a quite interesting Flames of War scenario, which is found in Wargames Illustrated (also online). Basically it takes place during the battle of the bulge, and has Joachim Piper trying to break through the American lines with a big column of Panzers. One of the main features of this attempt was that they had allot of problem driving down the narrow back roads and this is reflected in the mission.

The way it works in Flames of War is that you either set up an 18' long table, or divide it into 3 sections and play it as three linked games. The American Forces for each table are set down by the scenario including their locations, and the Germans have a large force that comes on 3 platooons at a time from their start point to represent the column. The Germans have deadline to meet at each table, while the Americans try to delay and wear them down.

As this battle takes place just after the Malmandy Massacre, they give the US a special war that they hate SS trops and so they are a bit more aggressive in assaults against those units.

I provided all the Americans and ran them, and Serge had the Germans, plus a few of mine to supplement. We never had all the exact right stuff so a few proxies or substitutions have been made. I had picked up a set of SS dice so I insisted that the Germans use these evil dice as they are sure to be less lucky. They happened to have 1 American dice in the set by mistake so I am wondering where the Germans came across this...


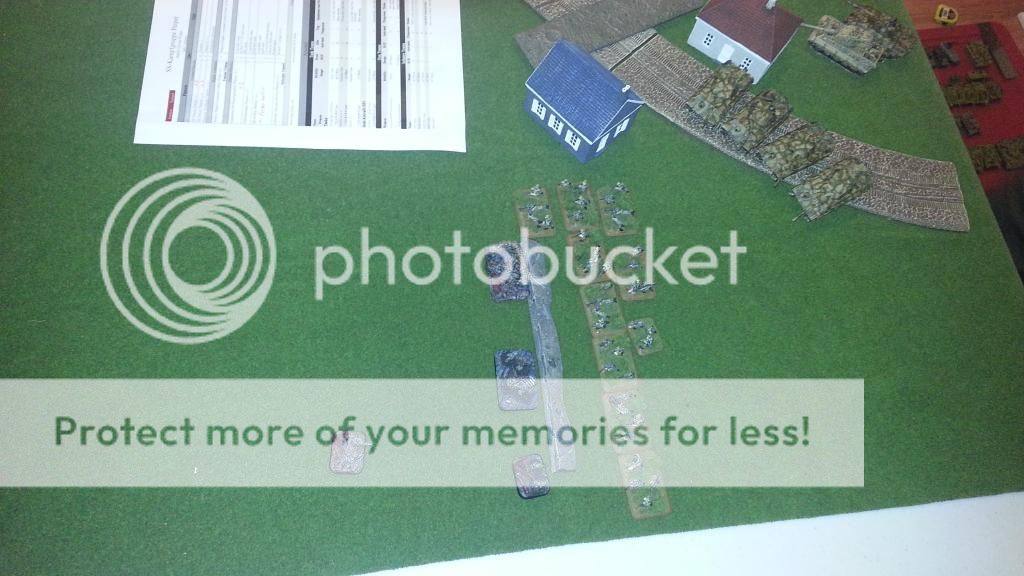
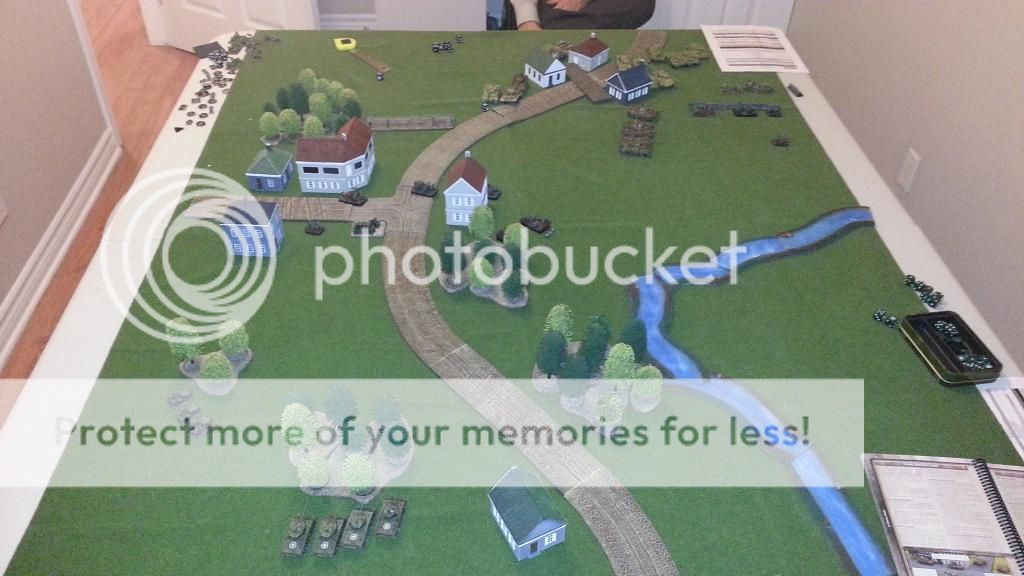
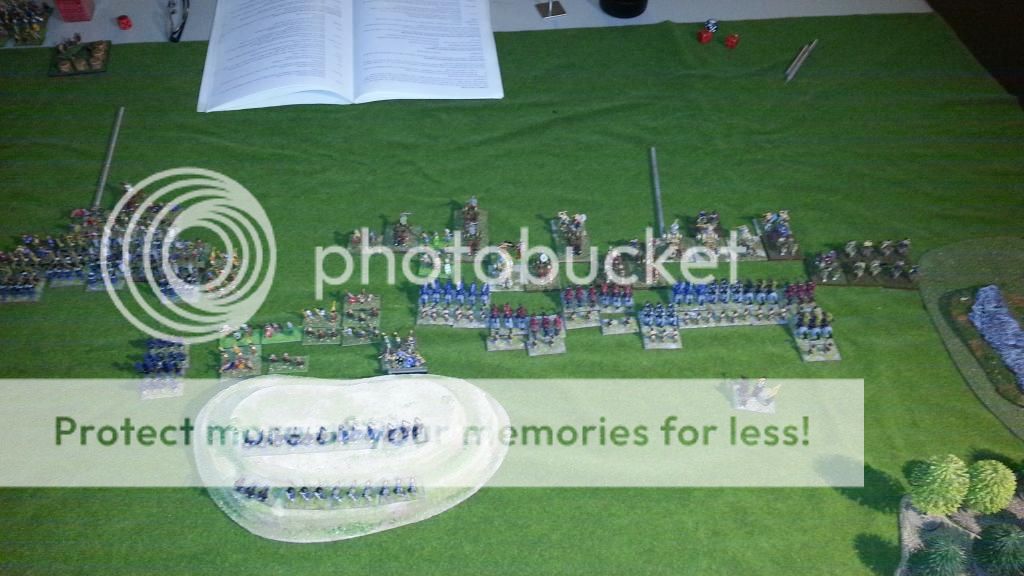
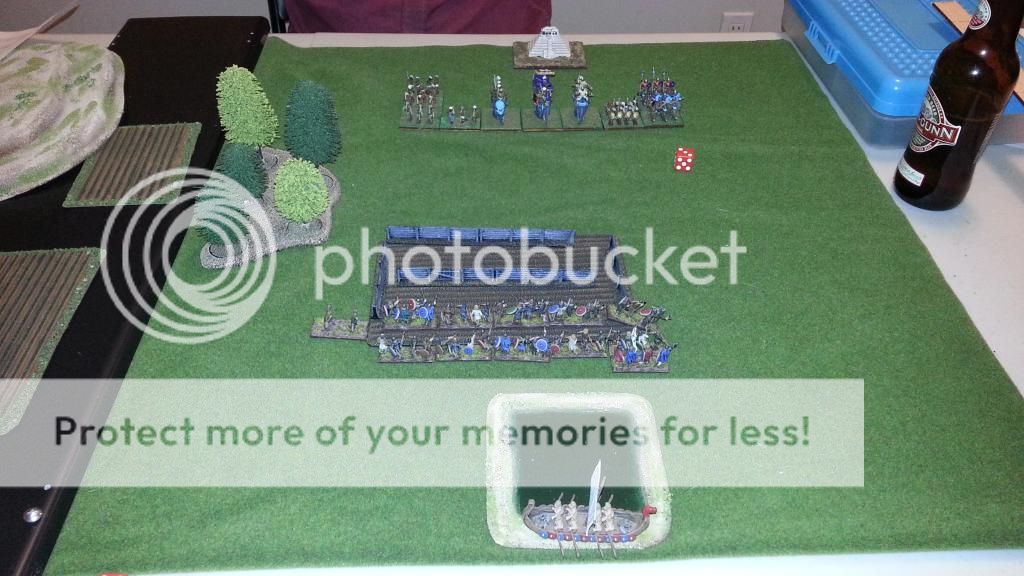
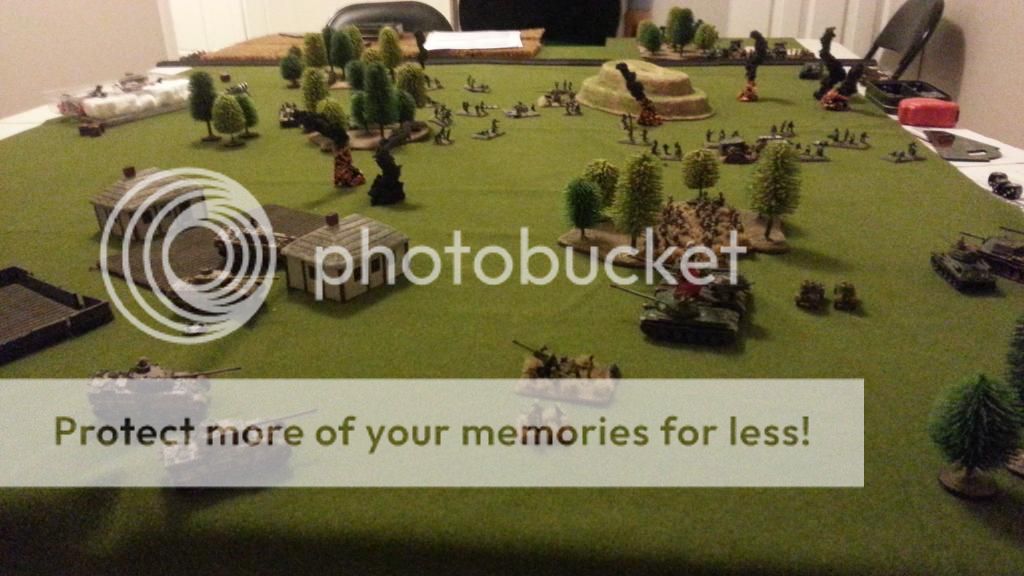
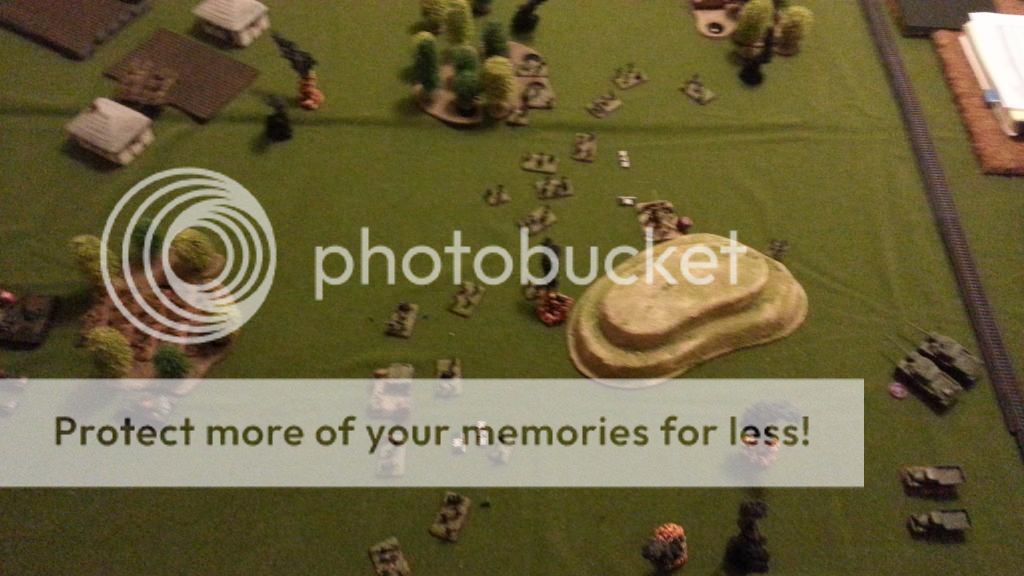
Here is the basic set up as per the scenario. I have a road block platoon (veteran), defending the village in the nort, with the road mined, this is the German start point. Towards the middle I have an infantry platoon defending a second village and a fuel depot (we forgot to place this objective until later. Also have a platoon of tanks and a tank destroyer platoon off camers in the south west corner.


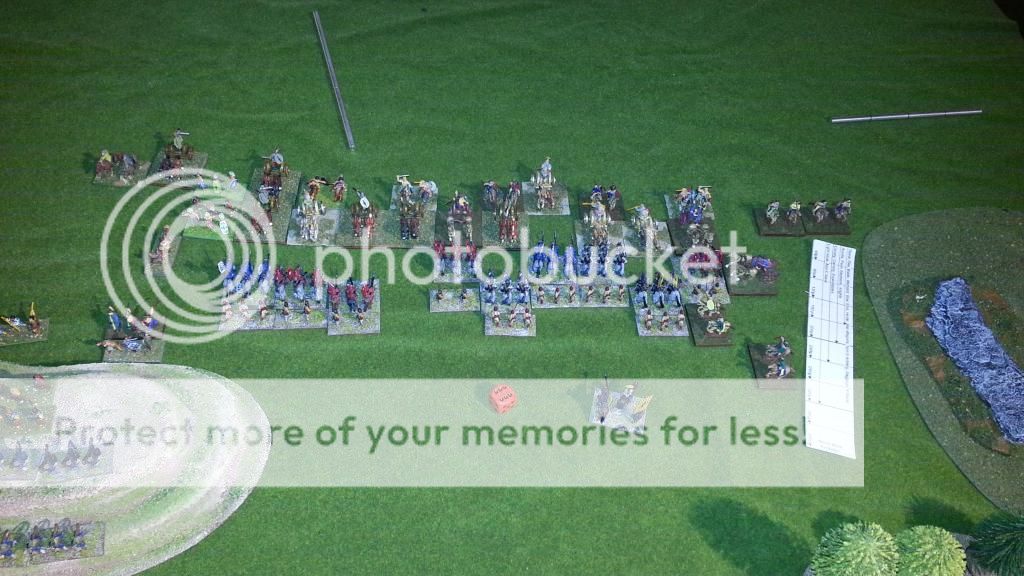
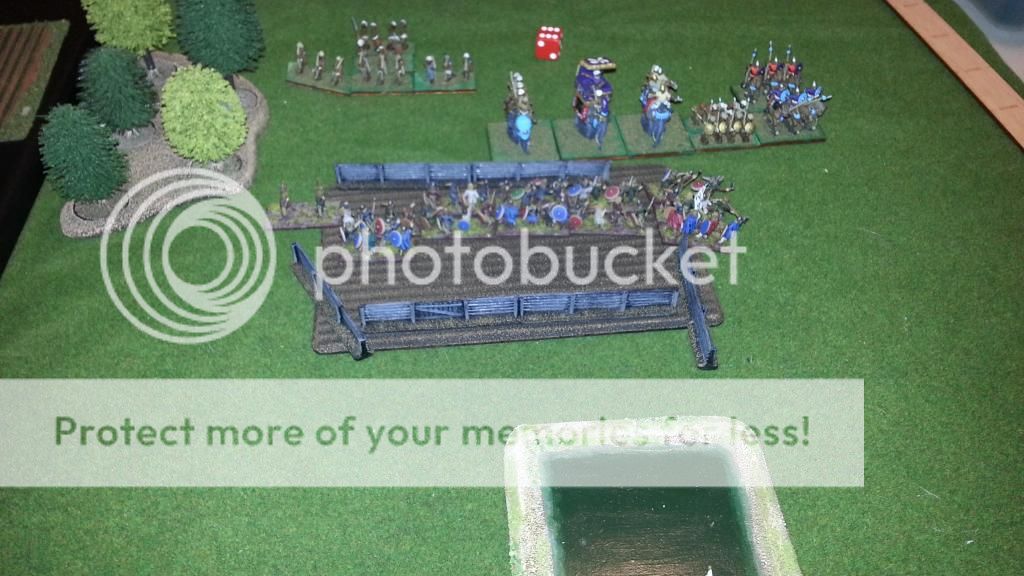
Turn 1 the Germans bring on a couple of King Tigers, some Panthers, and a full platoon of Fallschimjager infantry (the only non-SS guys). I figure things are not going to go well for my tiny road block platoon, even thou they have some decent defenses and a heavy machine gun.


But it turns out that they are heroes, and their defensive fire turn back a hasty German assault, and cause a few casualties. This ends up being a lesson on the importance of defending with veteran troops as all the rest of my stuff is merely trained.


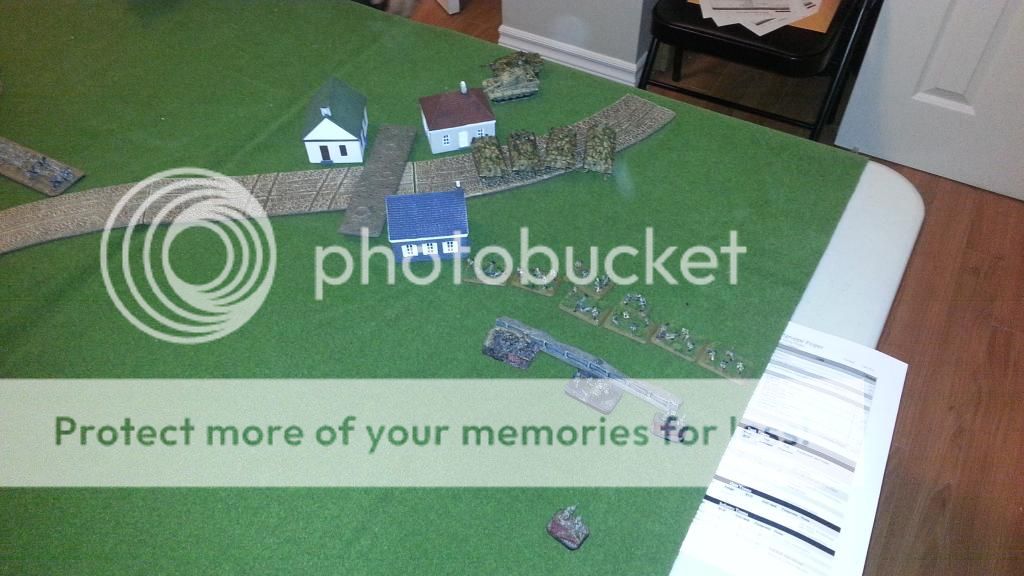
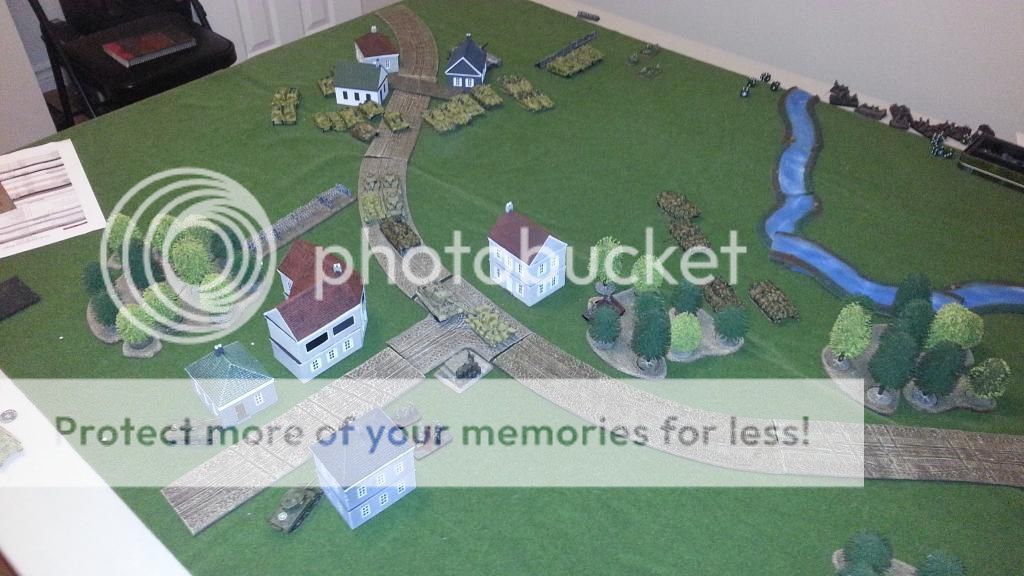
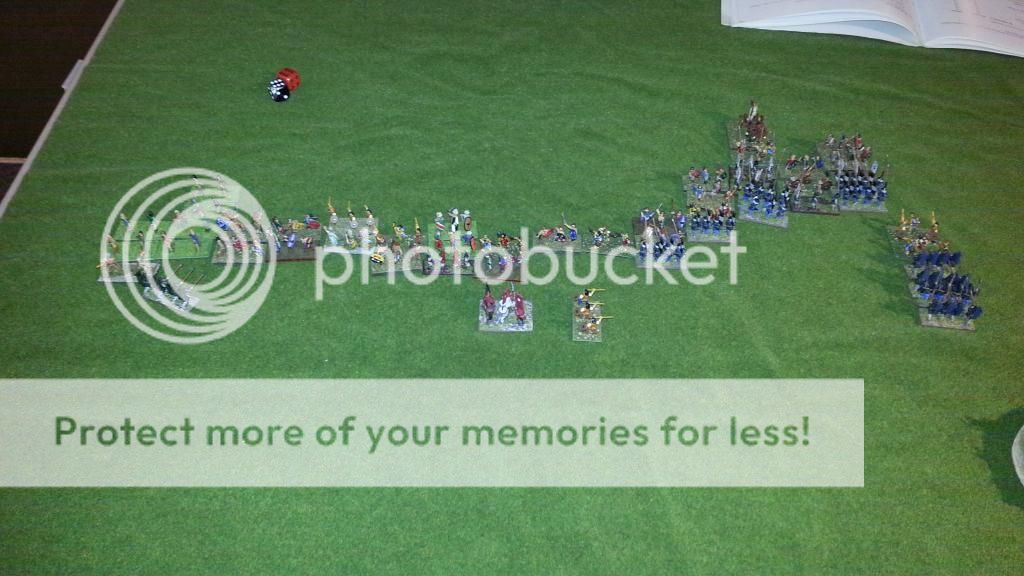
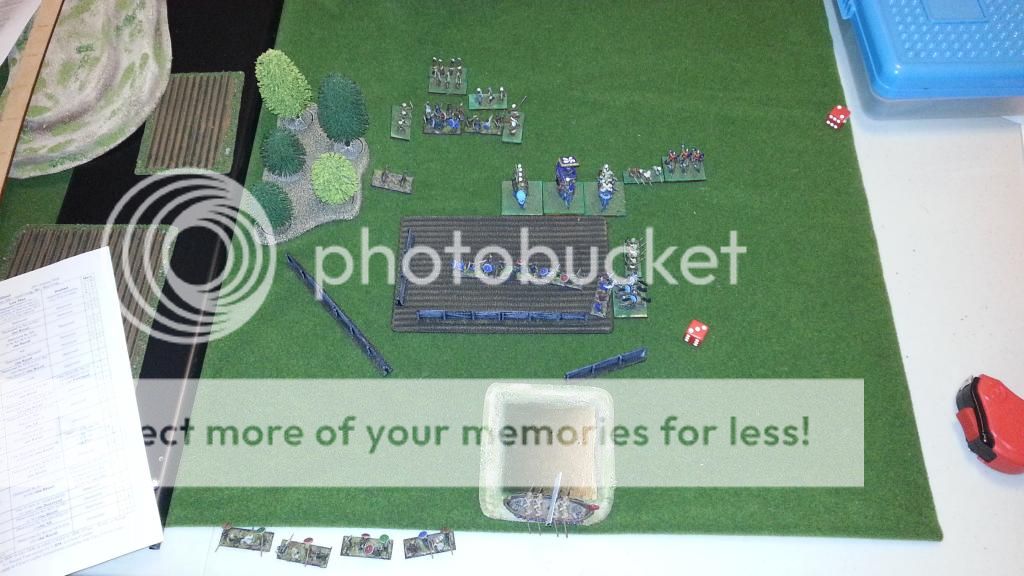
Next turn the Germans bring in even more tanks, and start to push their column onwards, but the mined road causes allot of delays (morality of mining a road in the middle of a vilage aside), as they have to go off road. This mission happened in the winter so everything but the road makes movement slow (we didn't have the right terrain either).

The Fallschimjagers tried another assault, this time they pinned my guys down first to limit the effective hits, but the heros still pushed them back with defensive fire, and took them down to only 3 teams. The tanks tried but weren't able to kill any with shooting.


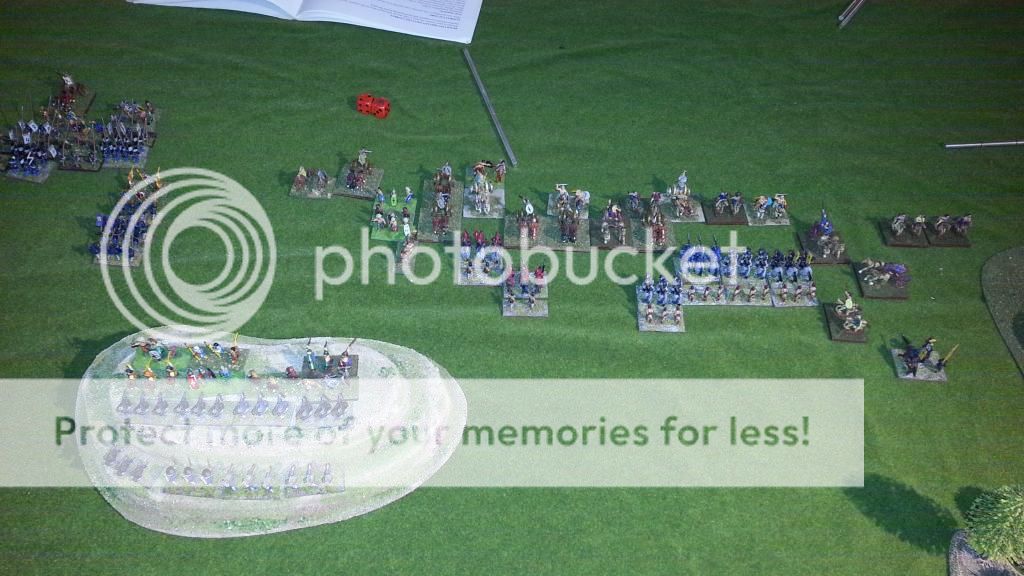
On my turn I started to bring forward my tanks and the tank destroyer platoon cautiously, not wanting them to be exposed to a ton of huge guns.


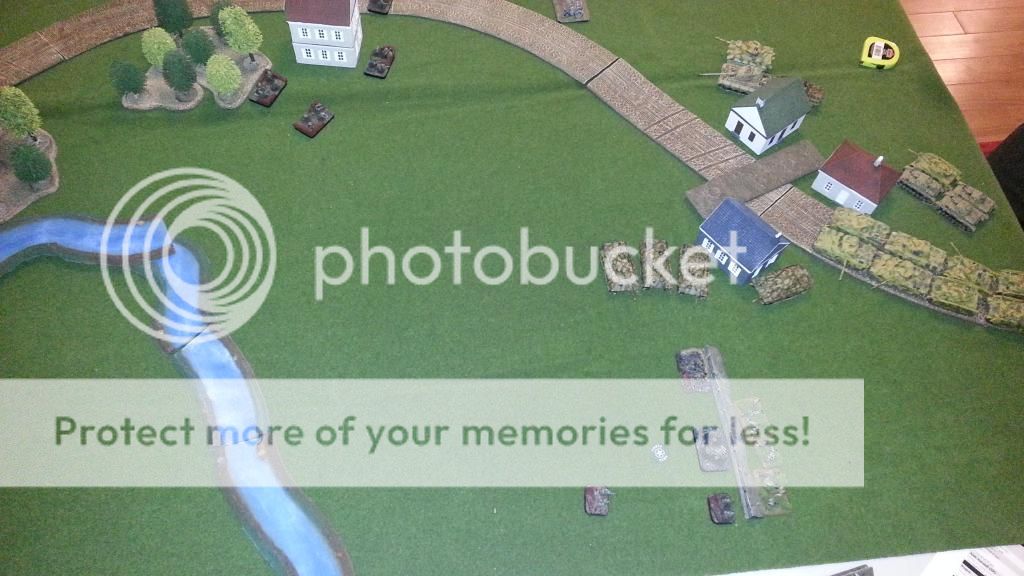
Next turn the Germans continue with their steel parade, and bring on the SS-Panzergrenadiers and some artillery, and the leads tanks get on towards my infantry platoon. But stubbornly they aren't willing to by pass my road block, and try an assault with tanks this time. They get in fine but the assault goes poorly for them, my bazooka bails one in the fighting and then they withdraw leaving him to be captured.


Next turn they are finely able to score some kills with shooting and leave just one team, which the 3 tanks finally mop up getting rid of the road block platoon. But it has cost them a platoon of infantry and a precious Panzer and they are still just at the very start.


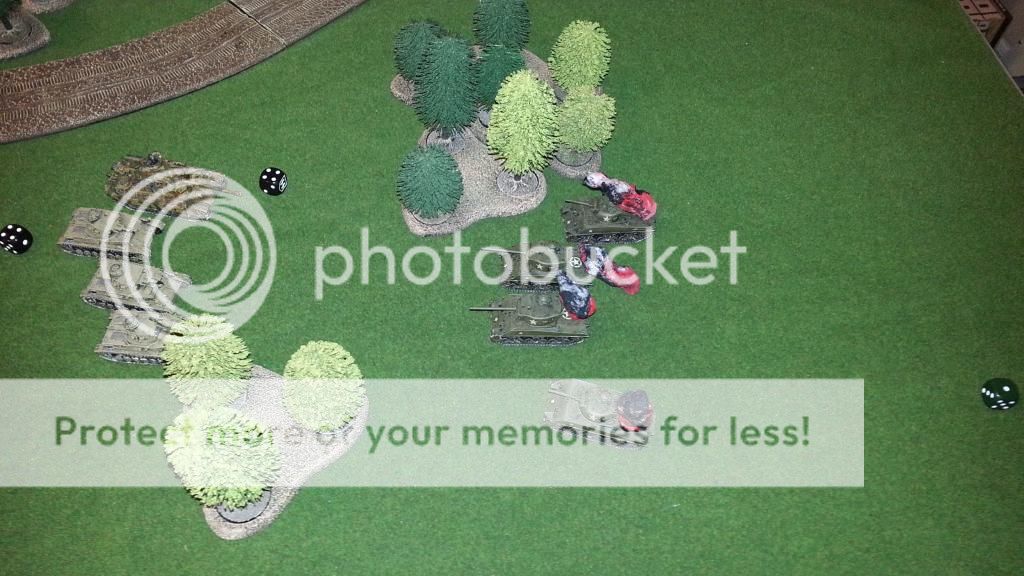
Meanwhile the lead tanks have but putting pressure on the next set of infantry, and an assault by the king tigers sees off most of them. But on my turn I am able to use the seek and destroy doctrine of my tank hunter platoon (2 Shermans masquerading as M10s), to ambush them into the village.


A chance to shoot king tiger in their vulnerable side armor s never to be missed and the M10s don't disappoint killing both of them! A big blow to the German effort.


However Piper is less amused and see that the tank destroyers are soon eliminated in turn. They are pressing into the fuel depot now which we have remembered to place.


 A quick assault their captures that objective so the Germans will get a free extra move next turn. Time is getting close as they have to be at the other end of the table by turn 8 and this is around turn 6, but not really hard with the free move, and almost all the Americans destroyed. I decided that it was time to put the tanks into the action and get a kill or 2 while I still could.


They manage to kill the lead Panzer 4.


But get surrounded by Panthers, and the inevitable happens.


So the Germans are free to advance to the next table, but with some losses, hopefully the Americans can keep this up. Here is a record of the German platoons and the casualties.

Panzer Platoon - 4x Panzer IV - 1 captured in an assaul
Panzer Platoon - 4x Panzer IV - 1 destroyed by Shermans in a gunnery duel
Panzer Platoon - 4x Panthers - No losses
Schwere Pzner Platoon - 2x King Tigers - Destroyed by Tank Destroyer ambush
Joachim Piper - 1x Panther - No losses
Fallschimjager Platoon - 9x Infantry team + Command - Reduced to 3 teams attempting to assault
SS-Panzer Grenadiers - 4x Halftracks, 7x infantry - No losses
Mechanized 15cm Artillery (Grille, represtnted by StugGs) - No losses
Mechanized AA Platoon - No losses

We will continue on into round 2 next Wednesday so look forward to that! Hopefully you will be able to read about lots of Panthers being blown up hah.

Thanks;
Mike


Saturday 22 November 2014

Battle Report - DBMM Tournament/League Round 3

So last night we played the last round of the DBMM league at the club. I had to take my Post Mongol Samurai up against some Ancient British. The British army is mostly made of warbands, which quick kill blades on their turn but get quick killed by blades on the blades turn, and chariots which count as Cavalry Ordinary. So I was thinking that it would be a pretty even battle, but I wanted to get my Cavalry fighting the warband if possible.


The terrain all ended up on my side of the board with a nice steep hill in the middle. There was a bit more terrain on the right flank, I had to deploy first, but in this game you have to draw a map showing where you plan to deploy your army. I decided to put my cavalry on the right hoping Duncan would guess that I would put it on the more open left and have his their leaving mine to fight his foot. I then put the superior bow which is in that command on the big hill and all my foot on the left.

As it turned out Duncan had drawn his map with two big lines all across the board with the Infantry in the front and the cavalry in the back, so he would get to basically recat to my deployment meaning my choice was actually meaningless. In retrospect I should have kept my foot back.

I had the first move and brought everything forward which is what you see in the picture above.


Duncan did the same with his troops. On my tur I put my pikes into combat against the warband, the blades were to far. I was hoping to do some damage while they couldn't qick kill me, but no luck on that although I never lost anyone.

My cavalry never had the orders to do much.


The British then attack all along their line and the combat really starts. I lost a couple of samurai foot but nothing serious and no cavalry. My bow units started to kill some of the British who were slowly climbing the hill, these guys turned out to be quite effective sitting up there.


In subsequent turns the battle continued with us trading a few blades for a few warband depending on whos turn it was, the bow continued to kill, and the cavalry not much happened.


Unfortunately at this point we discovered a big mistake, the warbands don't just kill the front rank of foot when they win on their turn, they kill 2 ranks deep. So at this point it stopped being a close and interesting battle and my line suddenly exploded, and the chariots started to flank around my cavalary and I started to take losses their as well.


So here we are at the end of the game a turn later, my foot has been badly mauled and are broken, breaking my army, and although the bow has killed allot of warbands they got into combat and killed a few of them, this was enough to almost break my cavalry command, but not quite. I had killed 20% of the British army thou which was enough to dishearten the warband command.

So it was at least a halfway interesting battle, I wish I had known how over matched my blades were against the warband at the start I think I could have refused that flank a bit and made a much different battle. Basically blades have no chance against a big bunch of warband unless you have something else to disrupt their battle line first.

Thanks;
Mike

Thursday 20 November 2014

DBA Ver 3 - Trial Games

So we got together last night to try a few games of the new version of DBA. I thought I would toss up a few brief battle reports, and give my thoughts on the changes. If the other guys have anything to add I would encourage them to put it in the comments.

The first game was Byzantines vs Asiatic Greeks, but my phones battery was to low to take any pictures. I put it on the charger so it would be ready for the following battles.

Old Saxon vs Byzantines

In the second game I took my Saxons up against the Byzantines, the Saxon army has 11 elements of solid warband, and 1 skirmisher, the Byzantines had a few knights, and few light horse, and a few foot elements. So it would be a race for me to kill the foot before the knights can massacre my warbands.

In this version the defender sets up the terrain as before, but there is a random component so they have less control over it then previously, and there is a chance that the attacker will get to place some pieces. The invader also gets to just choose which edge to attack, althought they must choose to attack along a road if possible.

Another important difference with terrain is that there are 2 types now, bad which slows you down and penalizes many elements in close combat, and rough which just slows movement.

So I set up my block of warbands to attack the enemy foot, and avoid the cavalary as much as I could.


The light hose jumped behind my lines, and our battle lines advanced, the movement is in base widths now and all elements move allot faster, especially light horse.


I wheeled my line to dodge the Knights, and sent my skirmisher over to hold them off. I figured since they can't be overlapped now I might buy a turn or 2.


I did get into a bit of action with the foot, but wasn't all that successful, so the knighst were able to get into my flank pretty quickly.


This lead to lots of dead elements, and the light horse sacked my camp, so lost game.

Old Saxons vs Some kind of Indian

Next game I invaded India, they had 3 elephants, a couple of cavalry, and a few foots elements, so kind of a similar action really, but I now had an enclosed field (rough going) to hide in and slow down the mounted troops allot.


We advanced our lines towards battle.


I sent 1 contingent of warbands to go fight the foot guys, and pulled back my line infront of the elephants, unfortunately the cavalry are flanking the edge of my line sticking out of the field.


Unfortunately the guys fighting the foot pushed them back without doing any casualties and got flanked and destroyed, and the guys on my flank killed a few elements, so another game over.


So I thought the new version of DBA was pretty good, it moves a bit faster with the bigger movement rates which I think is a good thing, and they have re-balanced a few of the match-ups to make them more interesting. For instanced knights now get quick killed by blades if the fight is a tie. The fast vs solid thing is a bit interesting as well, mainly fast move 1 extra base width, but get pushed back by solid foot on a tie. They also make it a bit less fiddly in general, so to me it is an improvement.

Another big change is that some lost elements don't count towards losing the game anymore, mainly hordes and camp followers. But double based elements cost extra for the first loss.

The book also has a way high production value, and it's available for new players to buy if they want. The readability of the rules has been improved allot as well, so it's easier to figure things out, although to be honest we were mostly playing from the quick reference sheet.

Thanks;
Mike

Tuesday 18 November 2014

Infinity - Operation Icestorm - Father Knight

So today I finished off the last guy in the Pan Oceania side of my Icestorm starter box. Had a bit of a hard time painting this guy but I think it turned out ok in the end. He is a member of the Knightly Orders, so I decided to paint him totally different then the other guys, in blue and white so he really stands out allot.

He has Deo Vindice written into his sword which I thought was kind of neat, it means 'Under God, Our Vindicator'. According to the wikipedia article I guess that is their way of saying God is on their side. You can't really see it in the picture but they have it very legible in person.

He is also stepping on the chopped up parts of a Nomad (the other side of the starter).


And here is the shot of them all together on the display base.


Paints Used:

Vallejo:
Flat Red

War Paints:
Electric Blue
Cloak Grey

GW:
Abaddon Black
Leadblecher
Dryad Bark
Belthsar Gold
White Scar
Mechanicus Standard Grey
Wazdaka Red
Pallid Witch Flesh
Kantor Blue
Khorne Red
Baneblade Brown
Mithril Silver
Shining Gold

Liquitex:
Black Ink


Thanks;
Mike

Friday 14 November 2014

Infinity - Operation Icestorm - Akalis Sikh Commando & ORC Troop

Well finished off the next two guys from my Operation Icestorm set for infinity. The commando is a drop troop so he has a rocket pack type thing, and the ORC troop is a power armored type guy, heavy infantry in this game.


Nothing fancy really, I started a new can of Dullcoat and it seems to have come out a little bit more shiny then usual for some reason but no big deal. Only have the father knight left for the Panoceania side now, I think I will paint him in a blue white color scheme thou so he will look allot different.

Here is a shot of the display tray so you can see how they are all looking together.


Also I have decided that it would be a good idea to add a paint list to these things, mainly for my own use. Sometimes there is a big gap between working on certain projects and I forget the exact colors so this would be a good resource for me to have.

It kind of looks like there is a bit of bare metal shining under the ORC troops arm pit so I will have to look into that...

Colors Used:

Vallejo:
Luftwaffe Green
Brown Violet
German Camo Medium Brown
German Camo Beige
Flat Red

GW:
Abbadon Black
Dawn Stone
Leadblecher
Khorne Red
Stormvermin Fur
Kator Blue

Liquitex:
Black Ink (diluted)

Thanks;
Mike

Thursday 13 November 2014

Battle Report - Flames of War - Desperate Measures

So had some more gaming last night, played a big game of Flames of War. The original intention was to try a 1900 point game using the new Desperate Measures book (1900 as that is the new point value for official tournaments), but ended up going a bit over so it was changed to be 1950.

Desperate Measures is the new very late war book that covers the Russians closing in on Germany, so the German force are suffering from worse and worse training and morale and the Russians are getting better, they pretty much cross over with the lists in this book. The German forces I played had a special rule 'Enjoy the War' so their units are likely to fall apart and retreat piece meal as they take losses. The Russian forces have a few new rules but the main one is that they take skill tests as if they were veteran.

Here are the lists I used, I split it into 2 Companies as I was expecting a third player, and it's allot of points for a single company like this. Basically a few Panthers and StugGs and a bunch of trained infantry with tons of Panzerfausts.


The Russians had an assault gun company with SU 100s, some IS 2s a bit of infantry, and some big anti-tank guns. We rolled for the mission and got surrounded, with me as the defender due to the Infantry component.

In this mission the attacker places 2 objectives in the defenders deployment which is in the center, and then attacks from 2 sides.


You can see the plane and the supplies in the open ground, I deployed an infantry platoon on each of those, and my special infantry with anti-tank guns in the middle hoping to cover both a bit. I than stached my StugGs in the woods, and my rocket launchers had to deploy in the open. My Panthers were in immediate ambush so I got to place them after the Russians. I was pretty sure that I would loose the game to company morale if I lost the fragile SutgGs so wanted to try and be careful with them.

The Russians crammed everything on the Right flank with some on each side of the board, so I had free space to do what I wanted on the left.


The Russians went first and make short work of the rocket launchers, they destroyed 3, and I lost the last to 'enjoy the war', the commander then auto-failed his 'all on your own test' at the start of my turn due to 'enjoy the war'.


I brought my Panthers around into the Village to flank the main tank force and get some kills, and brought out the main unit of StugGs, which was a big mistake. The infantry stayed in cover, except I started to bring over the left flank platoon.


Here we are a few turns later, most of the StugGs have been destroyed, one left in each platoon, the Panthers have destroyed a few Russian tanks but have now dangerously exposed themselves. No significant losses to the infantry except for an anti-tank gun or 2. The Russians have run into allot of trouble crossing the train tracks on the other end as they have overloaded tanks and heavy guns. So a bit of a delay down there.


The Russians pull back from attack the objective to battle the tanks, and do a good job of it. I have lost 1 StugG platoon and most of the Panthers. If this company losses another platoon they have to take company morale tests, so they are starting to be in danger of breaking and loosing me the game.


At this point I decided it's time to make some risky assaults with the infantry and try to get a few more kills on the tank. The assault guns down by the train tracks have no machine guns so they are a bit defenseless against my infantry who have lots of anti-tank close assault weapons. I send in 3 teams against the 3 guns (1 more behind the train tracks), and pass my tank terror test. we counter attack back and forth and I bail 1 tank and force them to fight. But I loose 2 stands and am forced to fall back with just the commander alive. This was the last chance for me to turn the battle as there was a good chance of me killing the platoon there and getting the guns next turn, but not to be.


The Russians keep up the tank battle and get the est of the Panther platoon leaving just the commander bailed, who now has to roll company morale as another StugG has been lost. The infantry in the woods had tried an assault but I pushed them back in defensive fire and killed half their teams. On my turn I make a last desperate assault on the infantry in the woods which would also draw in the IS 2s and give me a chance to kill them. But with the T34 commander involved as well they easily have enough fire to push me back with heavy losses. On the Russian turn they have no trouble taking out the tank commander meaning I will auto-fail my company morale test on the next turn so they win the game.

This one was a pretty fun game, there were a few points were it could have gone either way, in the end I was a bit to aggressive with my tanks, especially the vulnerable StugGs, and I should have designed my forces so that company had 4 platoons make it much harder to break. The new special rules really give the game a bit of a different dynamic, and I was certainly forced to make some desperate attacks!

We are going to try out the new version of DBA next week.

Thanks;
Mike